
- Home
- Toys
- E-Learning
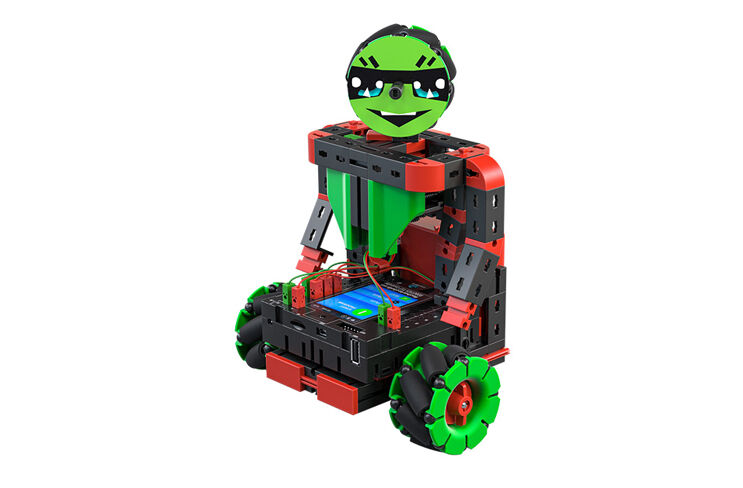
- ROBOTICS Smarttech
Hello!
We are happy you have chosen the "ROBOTICS Smarttech" construction set from fischertechnik. Because with this construction set you can conduct many interesting experiments and solve exciting tasks.
Read this didactic material and try the experiments and tasks, to learn step-by-step how you can control and program simple as well as complicated machines and robots using the ROBOTICS TXT Controller from fischertechnik.
Learning is a process of building things up from a foundation and it is not possible to start with the most difficult things right away, even though they may be a little bit more interesting than the more simple tasks. This is why we have structured the experiments and tasks in this booklet so that you learn something different with every new task and can then use this as the basis for the next task.
So don't worry, we will start with small things and then work together to progress to the big robots.
We hope you have a lot of fun and success now experimenting with your ROBOTICS Smarttech.
Your team from
fischertechnik
Some General Information
Before we really get started with the construction set, you still need to know a few things. Even though the components we will work with are very robust, if you do not handle them properly, they can be damaged under certain circumstances.
Electricity
As you certainly know, a lot of the components in the Smarttech use electric power. And you know it is necessary to be particularly careful not to make any mistakes when working with electrical components. That is why you should always read the assembly instructions very carefully when wiring the electrical components.
Never connect the positive and negative poles directly to one another to prevent a short-circuit. This can damage the TXT Controller or the rechargeable battery.
The subjects of electricity and electronics are just as interesting as robotics (which is what this construction set is about) and there is a construction set from fischertechnik, which deals specifically with these subjects. If you are interested in this, you will also have just as much fun with our "PROFI E-tronic" construction set as with the Smarttech.
Robot, Artificial Humans?
What is your first thought when you hear the word "robot?" Have you ever seen a robot? In a movie or on television? Or perhaps a real one?
There are many different types of robots. Some robots look a bit like a human, while others have only one or more arms. So, what exactly makes a robot a robot?
The dictionary states: "Robots are stationary or mobile machines, which perform set tasks according to a certain program."
ROBOTICS, (Almost) Everything Automatic
Thus, robots are machines controlled by a program. And we call this control of machines (or in our case models) "ROBOTICS."
The "ROBOTICS Smarttech" provides you with a wonderful start to learn about this subject. This is because the construction set contains everything you need to build and control many different machines.
You can create the programs for control of the models on a PC with the aid of the ROBO Pro 4.7.0 (or higher) software and then transfer them to the TXT Controller using the USB or Bluetooth connection. The controller then controls or operates the model according to the program you have prepared.
The construction set contains all of the following
First, it contains numerous fischertechnik building blocks, as well as motors, indicator lights and sensors and colored assembly instructions for building various models.
After you have unpacked all the building blocks, it is necessary to first assemble a few components such as cables and plugs before you can really get started. Details are given in the assembly instructions under "Assembly Tips." It is best to do this first.
Actuators
Actuators are all components, which can perform some type of action. This means that they become "active" in some way when they are connected to electric power. In most cases you can see this directly. A motor runs, an indicator light illuminates and so forth.
Mini Motor
The Mini motor is an electric motor, exactly as long and high as a fischertechnik building block. In addition, it is very light. This means, you can install it at points too small for the big motors.
Both gearboxes included in the construction set fit perfectly on the Mini motor.
The Mini motor is designed for a supply voltage of 9 volts and a maximum current of 0.3 amperes.

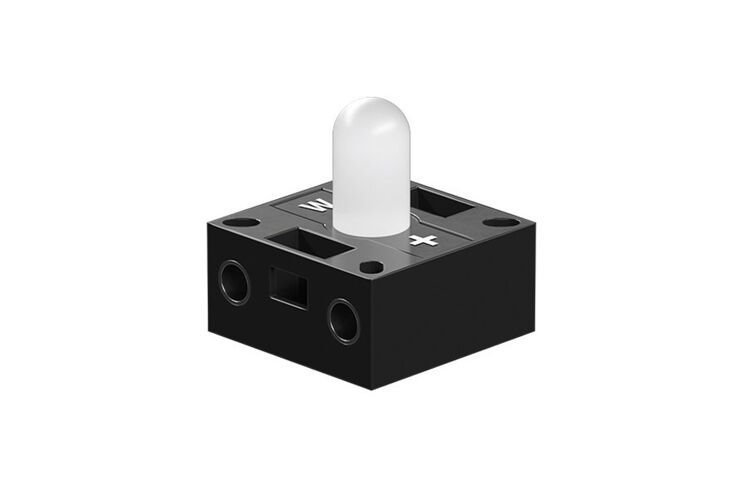
LEDs
The LED is contained in the construction set. It can be used in a variety of ways. For example as signal lights in a traffic light, as flashing lights on a robot or for better illumination of an image supplied by the camera also provided in the construction set.
The LED is designed for a voltage of 9 volts and consumes approximately 0.01 amperes of current.
Caution! When connecting the LED to the power supply, always pay particular attention to correct polarity. Connect the positive pole to the + marking on the LED.
Sensors
Sensors are so to speak the counterpart to the actuators. This is because they do not perform any actions, but react to certain situations and events. For example, a pushbutton reacts when pressed, allowing an electric current to flow or interrupting its flow. A heat sensor reacts to the temperature in its surroundings.
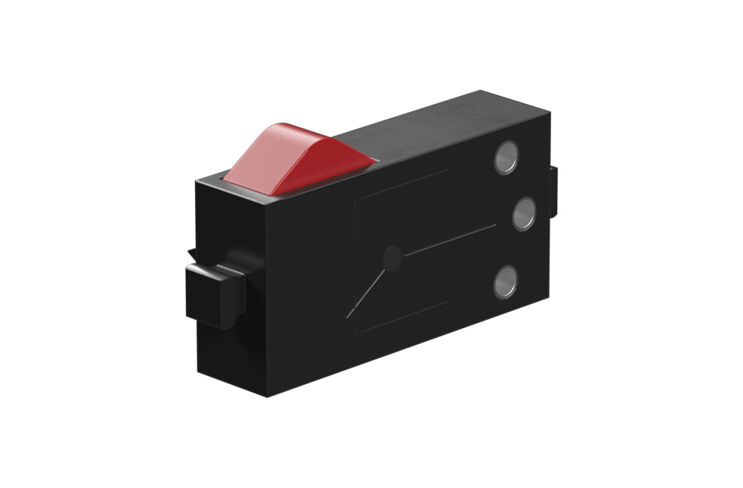
Pushbutton
The pushbutton could also be called a touch sensor. Pressing the red button actuates a switch mechanically allowing electricity to flow from contact 1 (middle contact) to contact 3. At the same time the circuit between contacts 1 and 2 is interrupted. So you can use the pushbutton in two different ways:
As a "normally open switch" (NO or push-to-make switch)
Contacts 1 and 3 are connected.
Pushbutton switch pressed: Electricity flows. When the pushbutton is not pressed: Electricity does not flow
As a "normally closed switch" (NC or push-to-break switch)
Contacts 1 and 2 are connected.
Pushbutton switch pressed: No electricity flows. When the pushbutton is not pressed: Electricity flows.
Gesture sensor
The gesture sensor is a new sensor module from fischertechnik. It is a small, multipurpose module with gesture recognition, colour recognition, distance measurement and ambient light detection functions. The sensor itself and how to program it are explained in more detail in the “Dimmer switch” task.

Basic information on the fischertechnik Omniwheels
The Mecanum wheel is a wheel that permits a vehicle outfitted with them to complete omnidirectional driving manoeuvres (movements in any direction), without having to be equipped with mechanical steering. That is why our wheels are called Omniwheels.
Sometimes, they are also called Ilon wheels, after their founder Bengt Ilon. In contrast to a poly wheel, in a Mecanum wheel the rollers are at an angle to the main axis.
How does it work?
Multiple, pivoted, barrel-shaped rollers are attached on the circumference (the “rim”) of the wheel, usually at an angle of 45 degrees to the axis of the overall wheel. Only these rollers are in contact with the ground. They do not have a direct drive, and can turn freely around their angled bearing axis.
The entire Mecanum wheel, in contrast, is driven by a drive motor such as the Mini Motor and a gear with variable direction of rotation and variable speed.
The vehicles equipped with them usually have four such wheels arranged in a rectangle (“chassis arrangement”).
The axes of the tilted rollers must either point in a star formation towards the centre of the vehicle on the contact surface, or all rotary axes of the rollers must be arranged in a circle (different angles chosen for the rollers on the front and rear axes – each +45° or −45° to the axis of the Mecanum wheel).
If this criterion is not fulfilled, omnidirectional drive forces cannot be generated. Only if the contact surfaces are arranged in a circle can they turn around the centre point, which is the objective in most applications.
Now, for some technical information:
The speed and direction of rotation for each wheel can be controlled individually. In extreme cases, this means a vehicle can travel laterally simply by setting opposite directions of rotation for the front and rear axes, without moving “forward” or having to rotate around the centre axis.
In order to be optimally prepared for the programming of the models, you can download an overview sheet on the drive and the directions of rotation of the Omniwheels here.zum Antrieb und zu den Drehrichtungen der Omniwheels herunterladen.
ROBOTICS TXT Controller
The ROBOTICS TXT Controller is the heart of this ROBOTICS construction set. It controls actuators, and evaluates the information from the sensors.
For this purpose, the TXT Controller has numerous terminals for connection to the components. The instruction manual for the TXT Controller describes which components can be connected to which connections and the functions of the connections.
The color touch screen allows convenient operation of your TXT Controller. The integrated Bluetooth and WLAN interface is a particularly interesting special feature. It allows you to complete a wireless link between your PC and the TXT Controller.
You can define how the controller interacts with the individual components and what they are to do in detail in the program you write with the ROBO Pro software.
ROBO Pro 4.7.x Software
ROBO Pro is a graphic programming interface for creating programs for the TXT Controller.
A "graphic programming interface" allows you to compile programs visually with the aid of graphic symbols instead of "writing" them out by TXT Discovery Set ROBOTICS 12 hand line for line.
The procedure for creating such a program is described in detail in the Chapter "First Steps". The ROBO Pro Help feature also shows how this works in Chapters 3 and 4.
A Few Tips
Experimenting makes the most fun when the experiments also work. This is why you should follow a few basic rules when building the models.
Interface Test
Once again here is our advice: Check each individual component for proper function with the aid of the ROBO Pro interface tests.
Short Circuits
When a positive and negative connection touch one another you have a short circuit. The battery as well as the TXT Controller have a built-in fuse to keep them from being damaged by a short circuit. They simply switch off the power supply for a while. Naturally, your model will not work anymore either.
The cause for a short circuit can be either a mistake in the wiring or screws which have not been tightened sufficiently in the connectors. They can touch when the connectors are plugged in, causing a short circuit. That's why you should always completely screw in the screws and plug in the plugs so that the screws cannot touch each other.
Cables and Wiring
If an electrical component does not work at all, check the cable used to connect it to the ROBOTICS TXT Controller again. For this purpose use the cable to connect the lens tip lamp to the battery. If the bulb lights up the cable should be okay.
Another source of errors are incorrectly installed plugs (for example, a green plug on a red cable).
Also check that "+" and "-" are correctly connected. For this purpose, compare your model with the illustrations in the assembly instructions.
Stromversorgung
Kleine Aussetzer oder langsam laufende Motoren deuten meistens auf einen leeren Akku hin. In diesem Fall solltest du den Akku mit dem Ladegerät aufladen. Der Akku ist vollständig geladen, wenn die rote LED am Ladegerät aufhört zu blinken und durchgehend leuchtet.
Loose Connection
A component, which works sometimes and doesn't work at other times, probably has a loose connection somewhere in the wiring for the component.
The most frequent causes for this are:
Errors in the Program
Even if no one likes to admit it: Everyone makes mistakes. And especially with complex programs, an error can creep in quite quickly.
If your model still doesn't do what you want it to after you have checked everything on the model itself and have remedied any faults, you should also check your program. Go through it line for line to see if you can find the error.
You can also watch the program running on the monitor in the online mode, which means with the TXT Controller connected to the PC. The program element active at any given moment is highlighted allowing you to always see the point where the program is and where the error occurs.
Last Sources for Help
If, in spite of all this, you have not found the error, there are still two possibilities for obtaining help:
Not finished yet
Was that everything? No, of course not. The experiments and models you tried out in this e-learning should only be the beginning. Your "first attempts to walk" so to speak in the gigantic and exciting realm of "ROBOTICS".
Fantasy
What we have shown you here is only a very small portion of the possibilities offered by your TXT Controller and the fischertechnik components. And now it is your turn. You can give your fantasy free rein and simply build what you feel like.
Changing the present
If you don't have any ideas for your own complete model then just take a look at the models in this booklet. Perhaps something will occur to you how to build a model differently. Or you can change the function of a model.
Drawing machine
For example, you could fasten a pen to the mobile robot, so that it can be moved up and down allowing it to write on a large piece of paper while the robot is moving across it. Then you can draw the figures the robot moves through. This turns your mobile robot in to a drawing machine.
Racing with friends
You can also use a thick felt-tip pen to draw your own obstacle course on a piece of paper and have the robot move through it. And if your friends have a TXT Controller, you can do even more interesting things. You can run races to see whose robot can master a given obstacle course faster.
Wireless freedom
Does your computer have a WLAN interface? If so you can connect the TXT Controller to the computer using WLAN instead of a USB cable. If not, you can buy a USB WLAN stick and use it for wireless connection between your TXT Controller and PC. This is described in the instruction manual for the TXT Controllers and at http://www.fischertechnik.de.
Persistance pays off
So, what are you waiting for? Get started! Invent and experiment! And don't be bothered by little setbacks. Patience and perseverance are primary factors for experimenting. The reward after this is a functioning model.
We hope you have lots of fun trying out your own ideas!