- Home
- Toys
- E-Learning
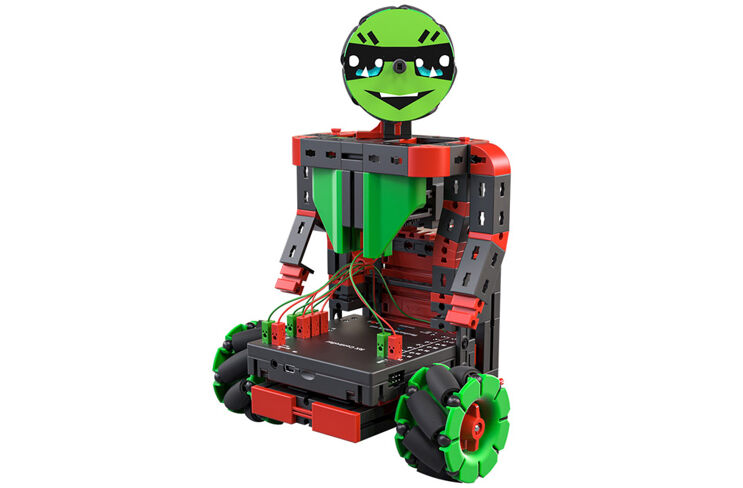
- Smart Robots Max

Hello!
We're delighted that you've chosen the "Smart Robots Max" construction kit from fischertechnik. With this kit, you can conduct a variety of interesting experiments and solve exciting challenges.
As you read through the accompanying materials and try out the experiments and tasks, you'll gradually learn how to control and program simple as well as complex machines and robots using the RX Controller from fischertechnik.
As is often the case with learning, you can't immediately dive into the most difficult things, even though they're usually a bit more interesting than the simpler ones. That's why we've structured the experiments and tasks so that with each new task, you learn something different that you can then apply to the next task.
So, don't worry, we start small and work our way up to the big robots together.
Now, we wish you lots of fun and success experimenting with the Smart Robots Max.
Your team at fischertechnik