- Home
- Schools
- Learning material
- STEM Coding Max
- Model-4-Distance-measurer

Measuring and surveying
Didactic note
Due to the complexity of the model, it is recommended that the way meter is only worked on at the end of the respective learning unit. The programming skills required are quite complex, and the knowledge on which the programming is based (see Programming skills) should already have been learned and applied in other models. For this reason, there are no step-by-step programming instructions in the part for pupils; the primary calculation of the measurement factors and the subsequent conversion of numbers from different number systems are relatively demanding for pupils. For this reason, the Ss section focuses on the necessary conversions and pulse/edge control.
Differentiation options
Competition
Motivational Aspects
Recording analog data, converting it into digital data and outputting the results is highly motivating for pupils. Converting one quantity into another presents a certain challenge. The topic provides a good basis for coding, which is becoming increasingly important in many professions.
If necessary, use a real object to introduce the topic:
|
Function of the distance meter
|
Technical solution |
|
Start of the measurement process
|
Travelling the distance to be measured |
|
Recording a distance/path
|
Pulse generator on the counter wheel outputs data |
|
Output of the measured distance "4 cm"
|
Color output of the green LED |
|
Output of the measured distance "16 cm"
|
Color output of the yellow LED |
|
Output of the measured distance "64 cm"
|
Color output of the red LED |
|
Output result
|
Output of the LED by pressing the button |
|
New measurement
|
Restart the system |
|
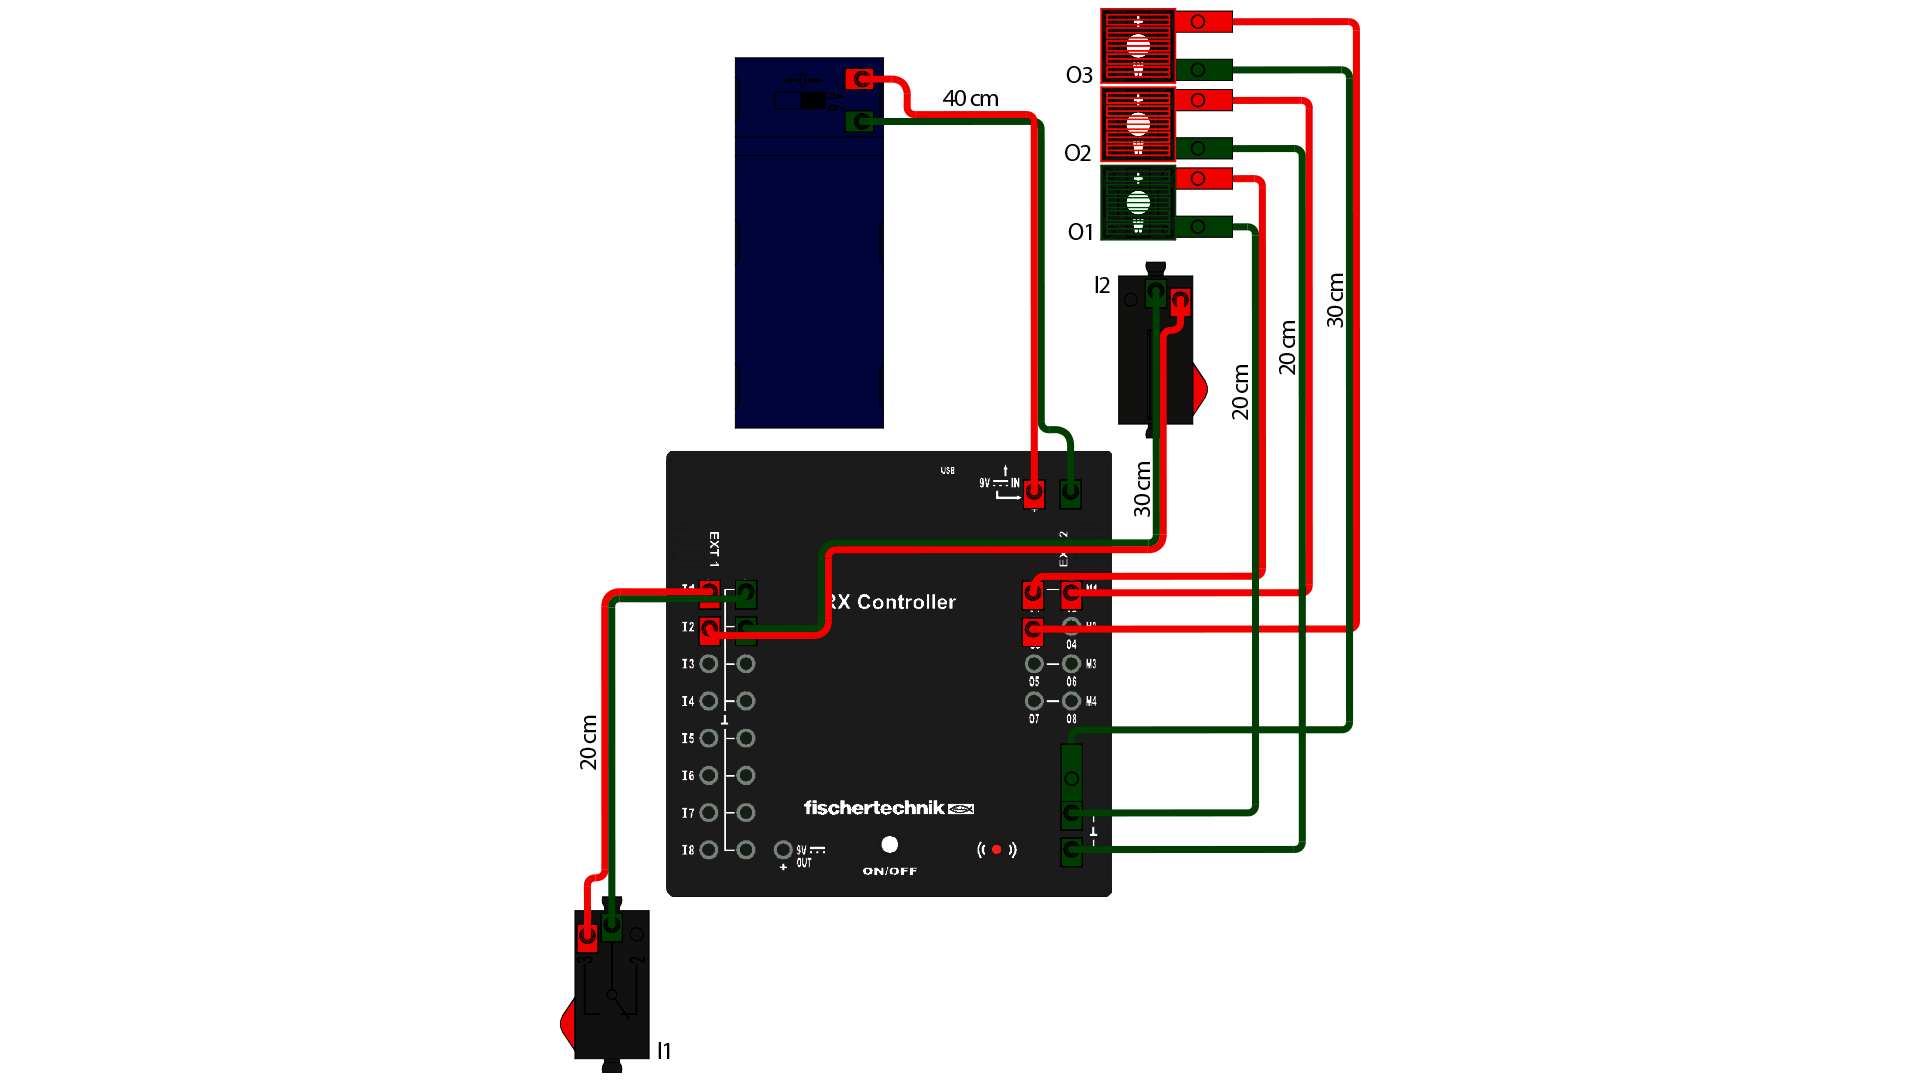
Sensors
|
Function |
|
1 impeller on a shaft
|
Detection of the disctance 1 |
|
1 button
|
Pulse counter |
|
Differentiation 4: 1 push-button
|
Intermediate storage and later retrieval of measurement results via 2nd button
|
|
Actuators
|
Function |
|
1 LED, green
|
Output for 2² units, e.g. 4 cm or multiples thereof Differentiation 2: Units of 2, e.g. 2 cm or multiples thereof Differentiation 3: Display of the measurement results for multiples of 2 cm
|
|
1 LED, yellow
|
Output for units of 2⁴, e.g. 16 cm or multiples thereof Differentiation 2: Differentiation 3:
|
|
1 LED, red
|
Output of units of 2⁶, e.g. 64 cm or multiples thereof Differentiation 2:
Units of 100, e.g. 100 cm or multiples thereof
|
|
Differentiation 3:
|
Enlargement of the possible measurement paths / measurement results |